Install and Upgrade
Edgematic Studio is packaged as a Neat SDK extension. You install it into the SiMa Neat Development Environment, activate it from inside the SDK container, and upgrade it the same way you installed it.
There are two ways to install:
- The Edgematic Studio Installer - a desktop application that walks you through the whole setup in four steps and sets up browser access to Studio for you. This is the recommended path for a first install.
sima-cli- the terminal flow.sima-cli sdk setupinstalls and starts Studio along with the Neat SDK. Use it when you need to script the install, pin an exact version, or work on a machine without a desktop session.
Both paths install the same bundle.
Prerequisites
Every path needs Docker running on the host and an approved SiMa Developer account.
Edgematic Studio itself runs inside the SiMa Neat SDK container, and how that container gets there depends on the path you take:
- Installer, Basic - nothing more to do. The Installer installs
sima-cli, signs you in to your SiMa Developer account, and downloads and sets up the Neat SDK for you. - Installer, Advanced - the Neat SDK must already be set up on the host. Follow Install the Environment, which is the source of truth for that flow, including
sima-cliinstallation and the host requirements. sima-cli- set up the Neat SDK by following Install the Environment.sima-cli sdk setupinstalls Studio as part of that flow; see Install withsima-cli.
Two choices in the SDK setup matter for Edgematic Studio:
- Install the Model Compiler when setup offers it. Studio's model-compile step depends on it, and it adds roughly 20 GB, so make sure the host has room. The Installer's Basic path installs it for you, and finishes without it if that download fails. The Advanced path does not add it. To add it to an existing SDK, see Install Model Compiler.
- DevKit pairing is optional. Deploying to a DevKit over Studio's default SSH transport needs no host-side pairing - you pair the board from inside Studio. Pair during SDK setup only if you want the NFS fast path; see DevKit Sync and Common Workflows.
You do not need to sign in to download the Neat SDK image, which is served from a public registry, but Studio itself needs your SiMa Developer account. It asks you to sign in the first time you open it, unless the Installer already did. That sign-in also reaches SiMa Developer Portal assets, such as the prebuilt models Studio's Model Zoo browser lists.
Install with the Edgematic Studio Installer
The Installer is a desktop application that walks you through the whole setup in four steps: it installs the SiMa CLI, signs you in to your SiMa Developer account, downloads and sets up the Neat SDK, and installs and activates Edgematic Studio. It also sets up browser access to Studio, so you do not have to forward the port yourself.
Get the Installer
Run this in a terminal on the host. It detects your platform, downloads the matching Installer, and launches it:
curl -fsSL https://studio.dev.vdp.sima.ai/install.sh | bash
That installs the latest build, which can be newer than the most recent release. To pin a fixed version instead, name a release tag:
curl -fsSL https://studio.dev.vdp.sima.ai/install.sh | EDGEMATIC_STUDIO_REF=v3.0.0.2 bash
The Installer is published for Linux x86_64, natively or under WSL2 on Windows (run the command inside the WSL shell), and for macOS on Apple Silicon. Intel Macs are not supported.
The Installer also sets up host access to Studio on port 8088, or the next free port up if the host already uses it. Set EDGEMATIC_PROXY_PORT=<port> before bash to pin the port. On a Basic install, EDGEMATIC_WITH_PROXY=0 skips that step.
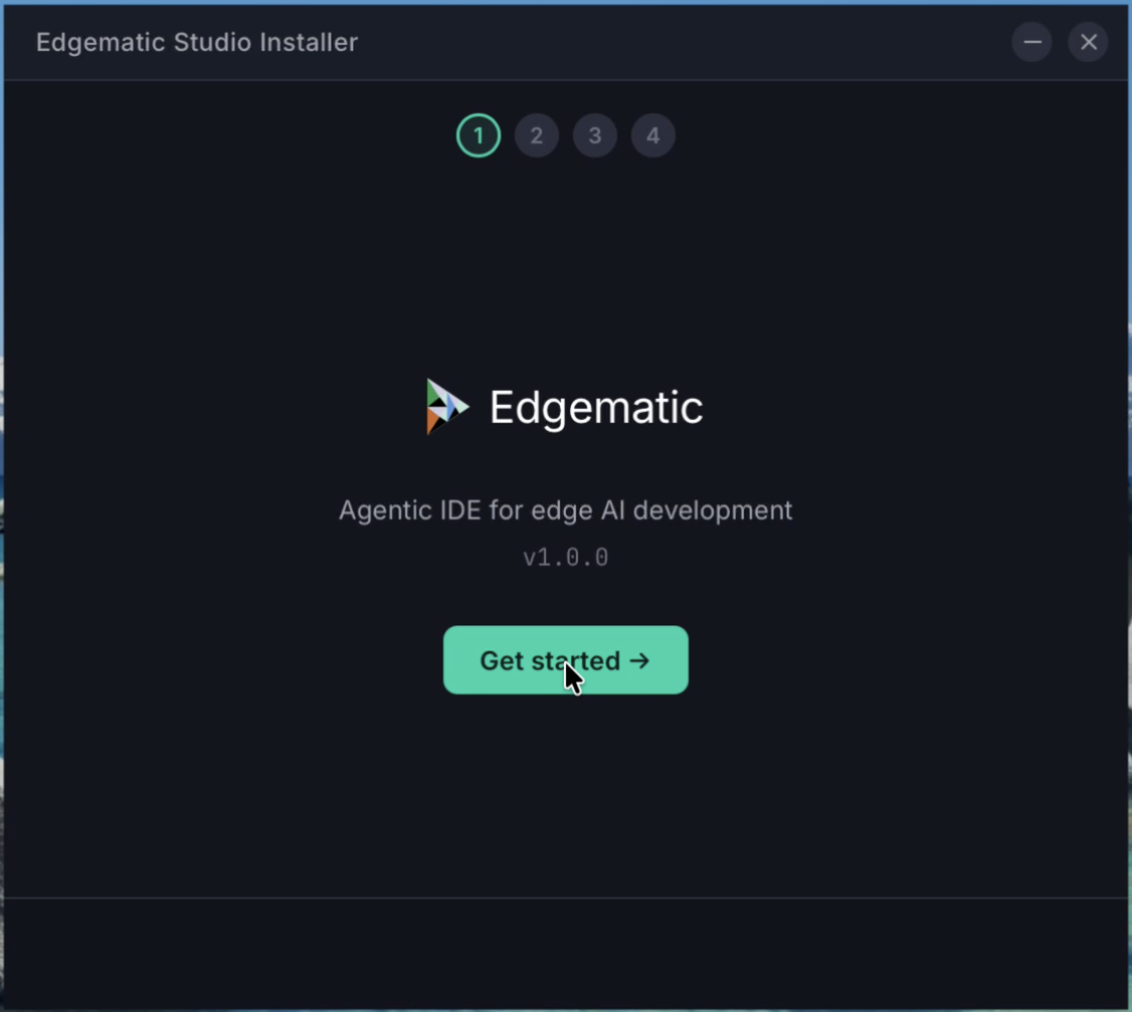
Step 1: Get started
Open the Installer and select Get started.
Step 2: Choose installation type
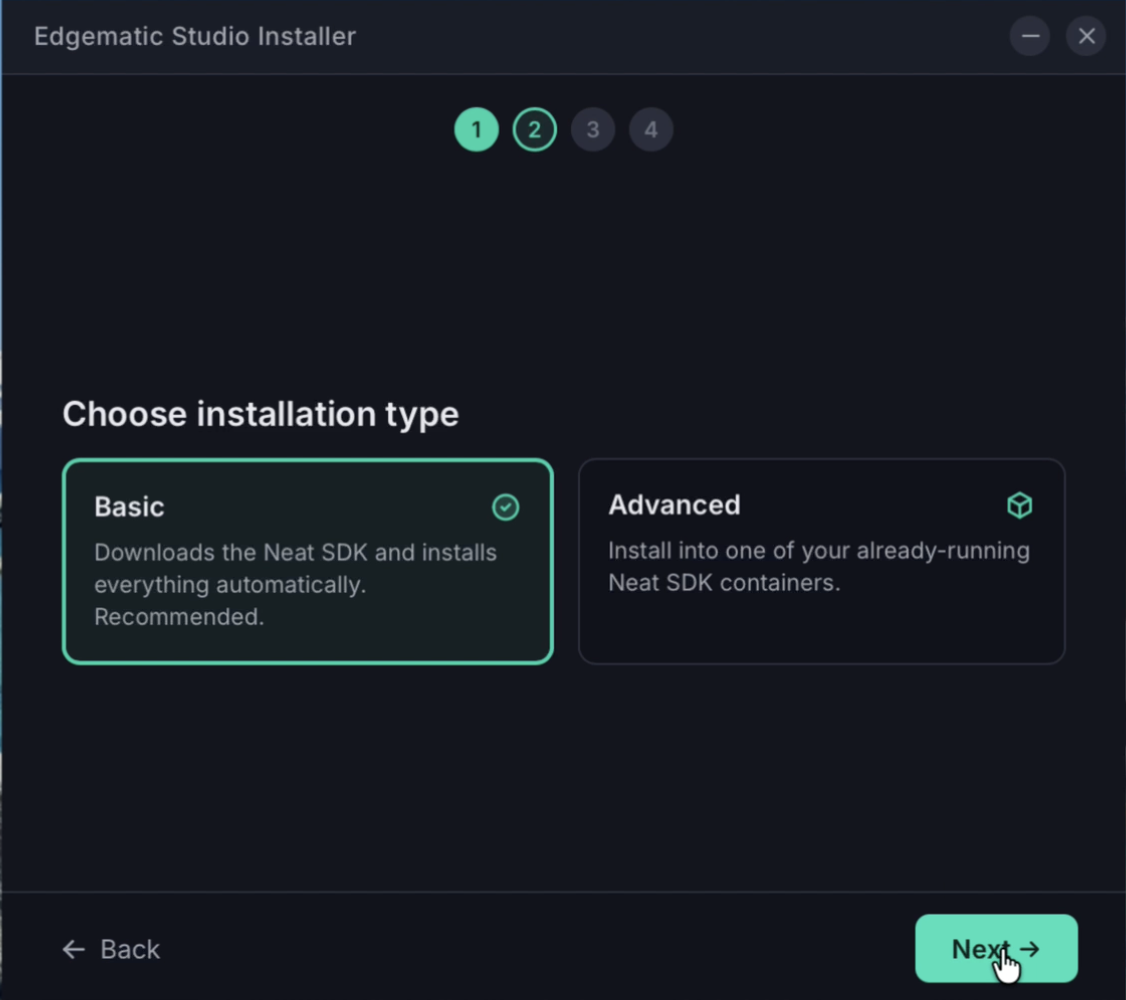
- Basic downloads the Neat SDK and installs everything automatically. Choose this unless you have a reason not to.
- Advanced installs Studio into one of your already-running Neat SDK containers. Use it when the SDK is already set up on this machine and you want Studio added to that container instead of a new one.
The next two steps follow Basic. With Advanced, step 3 lists your running Neat SDK containers to pick from instead of checking your system. Step 4 has no workspace folder, because Studio uses the folder the container already mounts, and its button reads Provision instead of Install.
Step 3: Checking your system
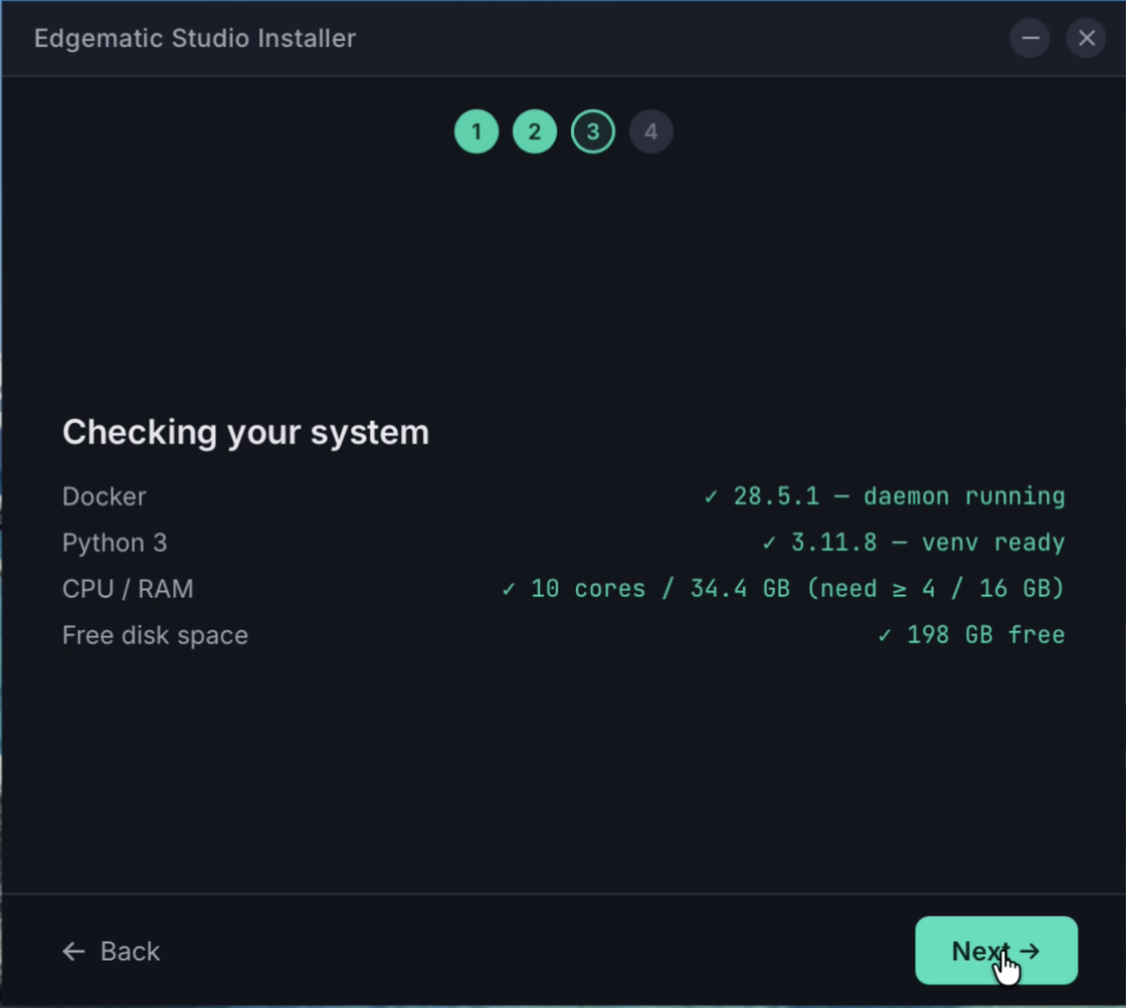
The Installer checks that the host can run Studio and reports what it found for each item:
- Docker - installed, with the daemon running.
- Python 3 - present, with a usable virtual environment.
- CPU / RAM - at least 4 cores and 16 GB.
- Free disk space - enough room for the SDK and the Model Compiler extension.
If a check fails, fix it on the host and select Retry.
Step 4: Ready to install
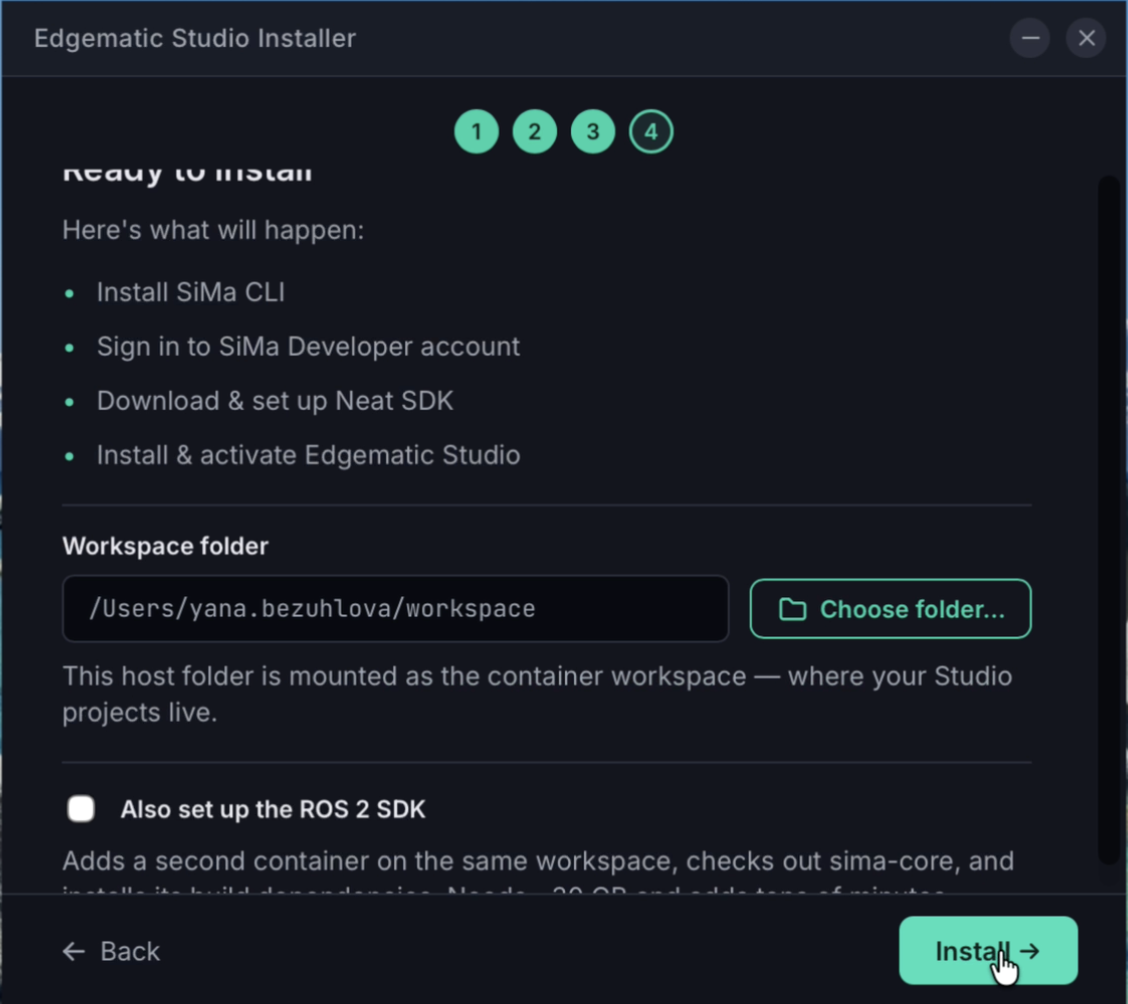
The last step lists exactly what is about to happen and asks for the two decisions the Installer cannot make for you:
- Workspace folder - a folder on your host that is mounted as the container workspace. This is where your work lives, so pick a location you can find again; the default is
workspacein your home folder. - Also set up the ROS 2 SDK - off by default, and available only on an arm64 host. On any other host, including Linux x86_64 and WSL2, the option is disabled and says why. It adds a second container on the same workspace, checks out
sima-core, and installs its build dependencies. It also adds the ROS skills for Studio's agent (see Agent skills). It needs a large amount of additional disk space and adds tens of minutes to the install, so leave it off unless you need ROS 2. If you only want the ROS skills, leave it off and add them later.
Select Install to start.
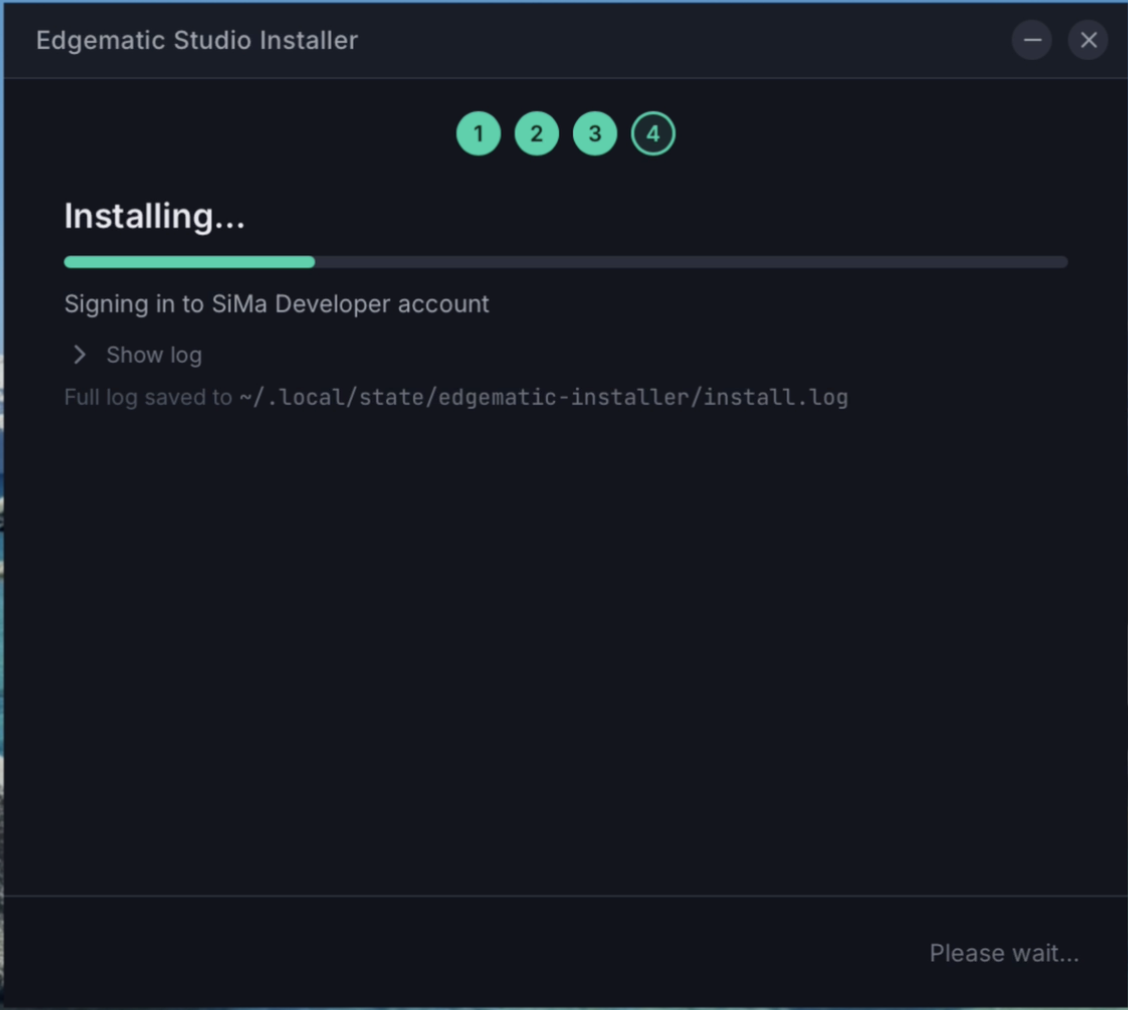
While it runs, the Installer shows the step it is on and a progress bar. Show log expands the detailed output, and the full log is written to ~/.local/state/edgematic-installer/install.log - that file is the first thing to look at if an install fails.
When the install finishes, the Installer shows the address to open in your browser. Select Close, open that address, and finish setup in Studio.
Install with sima-cli
From sima-cli 2.1.20, sima-cli sdk setup installs Studio by default when it creates a Neat SDK container. It installs the latest main build, publishes Studio's port to the host - 8088, or another free port if 8088 is taken - starts Studio, and prints its URL in an Edgematic Studio panel at the end of setup. Open that URL in your browser, then finish setup in Studio.
Setup installs the default agent skills. It does not install the ROS skills; add them later if you need them.
To set up the SDK without Studio, pass --no-edgematic-studio. To publish Studio's port but install Studio yourself later, pass --edgematic-studio-port. Docker fixes a container's port mappings when the container is created, so these options only apply to a new container.
The main build targets the newest DevKit baseline. To match an older DevKit, pass --edgematic-studio-port and install the matching release yourself.
Install manually
Install the Studio extension yourself when you need a specific version, or to add Studio to an SDK container that was created without it.
Run the install from a shell inside the SDK container. On a Linux host, the same command also succeeds outside the container, which puts Studio on the host instead. Enter the container first:
sima-cli sdk neat
Then run:
sima-cli neat install --env prod edgematic-studio/<arch>@<ref>
<arch>- the architecture of the SDK container Studio installs into:amd64orarm64.<ref>- a release tag such asv3.0.0.2to pin a fixed version, ormainfor the latest build, which can be newer than the most recent release.--env- the Vulcan artifact store. It defaults toprod, so it can be omitted for released builds; pass--env stgto install a staging-only build.
For example, in an amd64 container:
sima-cli neat install --env prod edgematic-studio/amd64@main
sima-cli downloads the bundle and runs the installer inside the SDK container. The installer adds the required system dependencies, unpacks Studio into the SDK extensions directory, provisions the coding-agent CLIs, installs the default agent skills, and registers the activate-edgematic-studio and deactivate-edgematic-studio shell commands.
Studio's version has four components and tracks the DevKit baseline it ships for: 3.0.0.1 is the first Studio release for the SiMa DevKit 3.0.0 baseline. Pin a release tag if you need a reproducible install. For a DevKit on the 2.1.3 baseline, pin a v2.1.3.x tag such as v2.1.3.3. Studio starts with its container from 3.0.0.2, so on an earlier release you run activate-edgematic-studio after each container restart.
Activate and open Studio
sima-cli sdk setup starts Studio for you, and Studio starts again on its own whenever the SDK container restarts. Use these steps after a manual install, or to start Studio again after you stop it.
Enter the SDK container:
sima-cli sdk neat
Start Studio (from a fresh shell, or run source ~/.bashrc first so the commands are on your PATH):
activate-edgematic-studio
The command starts the Studio server and prints the address it listens on:
Edgematic Studio running at http://localhost:8088
That address is inside the SDK container. If you installed with the Installer, or sima-cli sdk setup created the container with Studio's port published, browser access is already set up: open the address the Installer or setup showed you. Otherwise, see Reach Studio from your browser below.
Stop the server and remove Studio from your PATH:
deactivate-edgematic-studio
Studio listens on port 8088 inside the container. It starts again on its own when the container restarts, so deactivate-edgematic-studio stops it only until the next restart. If Studio does not answer after a restart, run activate-edgematic-studio; the automatic start logs to /var/log/supervisor/edgematic-studio.log. Re-running activate-edgematic-studio while Studio is already running is safe - it reports the running instance instead of starting a second one. To use a different port, set EDGEMATIC_STUDIO_PORT before activating. The port is not negotiated: if something else in the container already holds it, Studio does not start, even though the command prints the address. The reason is in /sdk-extensions/edgematic-studio/logs/studio.log. A port set this way applies to that activation only, and it is not forwarded to the host.
Reach Studio from your browser
When sima-cli sdk setup creates the SDK container, it publishes Studio's port and prints the URL, so there is nothing to forward. A container created without that port - by sima-cli 2.1.19 or earlier, or with --no-edgematic-studio - has no mapping, and Docker cannot add one to an existing container. Recreate the container with sima-cli sdk setup, or forward the port with a small proxy container on the SDK's Docker network:
docker run -d --name studio-fwd --network simasdkbridge -p 8088:8088 \
  alpine/socat TCP-LISTEN:8088,fork,reuseaddr TCP:<sdk-container-name>:8088
Find <sdk-container-name> with docker ps. Studio is then available at:
http://localhost:8088
If another process on the host already holds 8088, publish on a different host port instead - for example -p 8090:8088, then open http://localhost:8090. From another machine on the same network, use the SDK host's IP address in place of localhost.
Remove the proxy when you no longer need it:
docker rm -f studio-fwd
The Edgematic Studio Installer sets this proxy up for you as part of its install flow. The manual step above is only needed for SDK containers created without Studio's port.
Finish setup in Studio
The first time you open Studio, it takes you through two steps in the browser, however you installed it. It asks again for whichever one is missing, so you see the agent step again after every upgrade.
Sign in to your SiMa account
Studio needs your SiMa Developer account, and this step cannot be skipped. If the Installer already signed you in, Studio moves on by itself.
Connect your AI agent
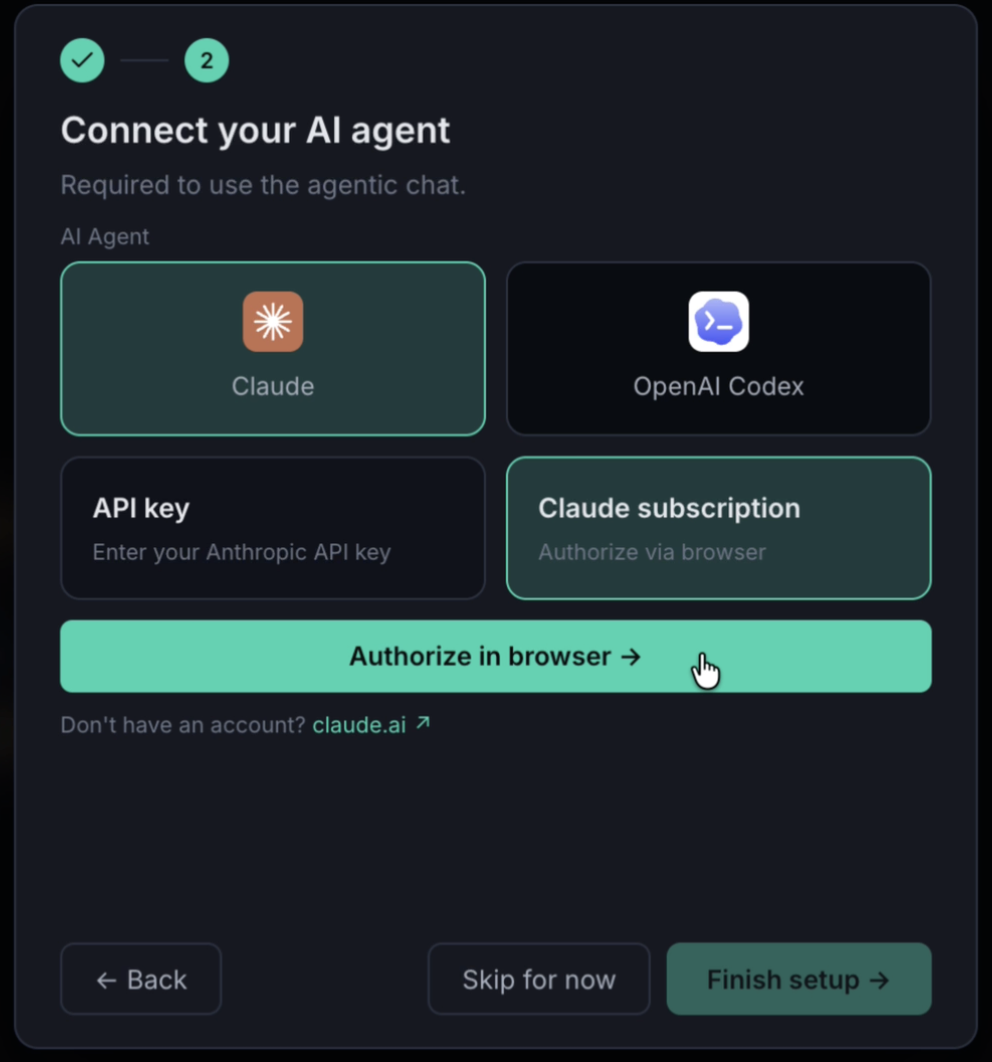
Pick the agent that powers Studio's chat - Claude or OpenAI Codex - and how to authorize it:
- API key - paste a key you already have.
- Claude subscription or Codex CLI - authorize through the browser with an existing subscription.
With Claude subscription, select Authorize in browser. Studio shows a URL; open it, approve access, and copy the code you are given.
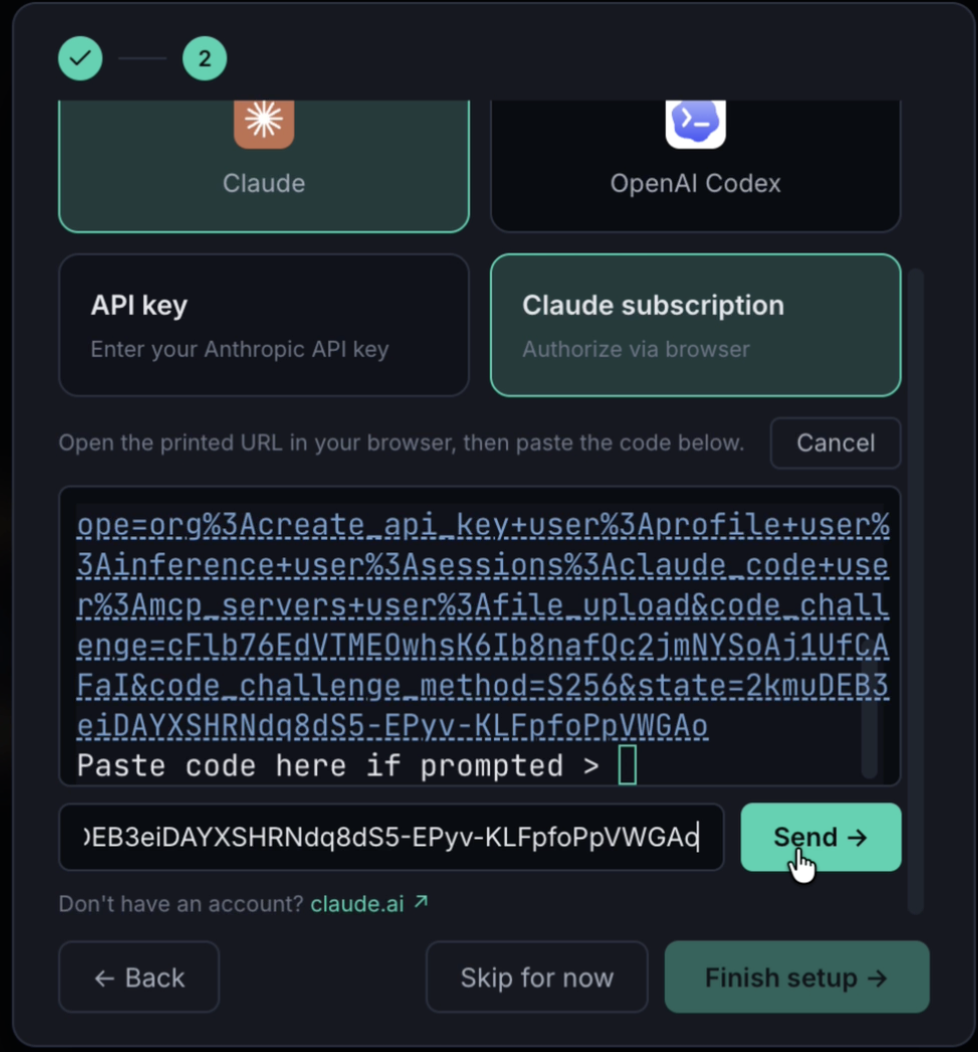
Paste the code into the field and select Send, then Finish setup.
With Codex CLI, select Authorize in browser, follow the device sign-in Studio shows, then select Finish setup.
You can also select Skip for now and connect the agent later in Settings > Agents. Until an agent is connected, the chat reports a setup error instead of answering, so everything else in Studio works but the agentic part does not.
Agent skills
Skills are the instructions Studio's agent reads before it works on a task. They are folders in ~/.claude/skills and ~/.codex/skills inside the SDK container. Any other agent tool in the container, such as an agent extension in VS Code, reads the same folders, so a skill that is not installed is not offered to any of them.
What ends up on disk depends on how you install:
- A default install - the Neat skills and Edgematic Studio's base skills. This is what
sima-cli sdk setup,sima-cli neat install, and the Installer with Also set up the ROS 2 SDK off give you. - The ROS 2 option in the Installer - everything in a default install, plus the ROS skills.
The install lists what is in each folder at the end of its output. If the skills cannot be downloaded, the install prints a warning and carries on: Studio still installs and runs, and the agent works without those skills.
Add the ROS skills later
Turning on ROS2 pipelines in Settings > Robotics installs the ROS skills for you. This needs internet access. The panel shows the progress and tells you when the skills are installed; the agent picks them up on a later turn, and you do not need to restart Studio. Turning the switch off, or restarting Studio, does not remove them.
If the install cannot finish, for example because the host is offline, the switch stays on and the panel shows why, with the command to run yourself. If ROS2 pipelines was already on when Studio started, use the Install ROS skills button in the same panel.
To add the ROS skills by hand instead, enter the SDK container:
sima-cli sdk neat
Then run this there, as the same user that runs activate-edgematic-studio:
sima-cli playbooks install gh:sima-vertical-solutions/edgematic-playbooks/skills-ros --force
This needs internet access. You do not need to restart Studio. Wait about 30 seconds, then start a new chat session to use the new skills.
Skills you install this way keep updating: every later upgrade in the same container updates them too, and says so in its output, even with the ROS 2 option off.
To stop that, remove all of them. List what is installed with sima-cli playbooks list, then remove each ROS skill with sima-cli playbooks remove -y <skill>. Removing only some of them does not stick, because one remaining ROS skill reinstalls the whole set on the next upgrade. Use the command rather than deleting the folder, which leaves the skill recorded as installed.
Upgrade Edgematic Studio
A Studio installed from main tells you when a new version is available and shows you the command that launches the Installer. A Studio pinned to a release tag stays on that release and does not check for newer Studio versions. Upgrades are not applied from inside the running container, so run that command in a terminal on the host.
There are three ways to upgrade, and they differ in what happens to the SDK container:
- Installer, Basic - downloads the latest Neat SDK image, replaces the SDK container with a new one, and installs Studio into it. Your workspace folder and Studio's own data, such as paired devices, are kept on the host. Choose the same workspace folder as before, because the chooser starts at the default. Anything you added inside the container itself is removed, including packages you installed and files in its home folder.
- Installer, Advanced - installs the new Studio into a running container you pick. The container and the Neat SDK in it stay as they are.
sima-cli- does the same as Advanced, from a shell inside the container.
Every install or upgrade disconnects your coding agents. The first time Studio starts after one, it removes its agents, their API keys and logins, and its usage totals, then asks you to connect an agent again. Your projects, chat history, paired devices, and permission settings are kept. Restarting Studio or the container does not do this.
To upgrade with the Installer, run the same command as a fresh install (see Get the Installer) and choose Basic or Advanced.
To upgrade with sima-cli, enter the SDK container with sima-cli sdk neat and run the same command you installed with. If sima-cli sdk setup installed Studio, that is the latest-build command below.
For a specific release:
sima-cli neat install --env prod edgematic-studio/<arch>@<release-tag>
For the latest build:
sima-cli neat install --env prod edgematic-studio/<arch>@main
After upgrading with sima-cli, restart Studio to run the new version:
deactivate-edgematic-studio
activate-edgematic-studio
What an upgrade does to your skills
This section covers upgrades in the same container: Installer, Advanced and sima-cli. A Basic upgrade replaces the container, so you start again from the default skills, plus the ROS skills if you choose the ROS 2 option.
An upgrade in the same container installs the current skills and then removes the skills an earlier Studio version installed that are not part of the set you now have. That covers:
- Skills Edgematic Studio no longer ships.
- ROS skills from an earlier version, if this upgrade did not include them. Earlier versions installed the ROS skills by default, so a first upgrade without the ROS 2 option removes them.
The output names each skill it removed and prints the command that brings the ROS skills back, the same one as in Add the ROS skills later. If you use the ROS skills but do not want to repeat the ROS 2 setup, upgrade without the option and run that command afterwards.
An upgrade leaves everything else alone: skills from other sources, folders you added yourself, and ROS skills you added with that command. Nothing is removed if installing Edgematic Studio's own skills failed, for example because the host is offline, so those skills stay until a later upgrade succeeds. Only the skills of the user running the upgrade are affected.